Crunchtime Kitchen Hardware – KP-9000
QSR verkoopt een reeks hardware-opties die het beste passen bij uw keukenbehoeften. De KP-9000 is onze Bluetooth stootbalkoplossing. Hieronder bespreken we hoe u dit apparaat instelt binnen onze ControlPoint beheersoftware en het apparaat te koppelen aan
Het apparaat koppelen:
Koppelen met een controller met ingebouwde Bluetooth-functie:
- De KP-9000 kan worden geleverd met een koppelingsdongle, maar dat is standaard niet het geval.
- De apparaten die we momenteel verkopen hebben Bluetooth, dus een dongle is niet nodig.
- Schakel alle controllers uit, behalve het apparaat dat aan de KP-9000 stootbalk wordt gekoppeld.
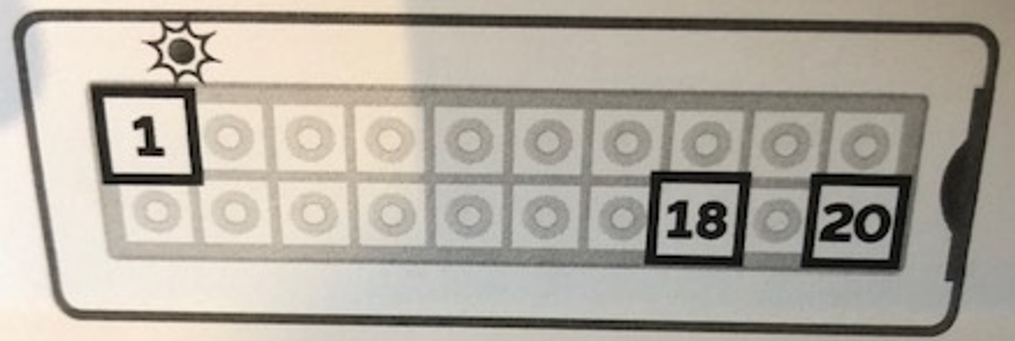
- Om de bumpbar in de koppelmodus te zetten, druk je tegelijkertijd op de knop linksboven en de knop rechtsonder gedurende 5 seconden. Het LED-lampje blijft een seconde lang groen branden.

- De Bump Bar zou moeten verschijnen als een beschikbaar apparaat om verbinding mee te maken op de controller.
- Houd de knoppen 1 en 18 ingedrukt om de Bump Par te ontkoppelen.
ControlPoint-configuratie:
Een Bump Bar-sjabloon maken:
- Om sommige instellingen van de KP-9000 stootbalk te beheren, moet een stootbalksjabloon worden aangemaakt.
- Klik in ControlPoint op het pictogram van de hobbelbalk
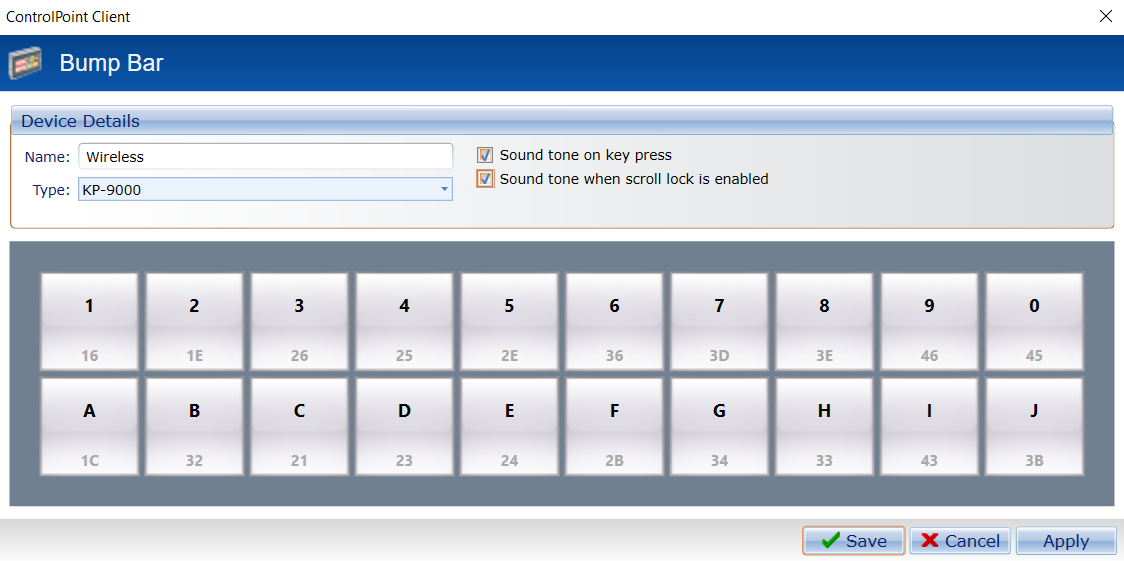
 Klik vervolgens in het formulier Bump Bar op de knop Toevoegen om de sjabloon te maken.
- Geef de sjabloon een naam voor eenvoudige herkenning en kies vervolgens KP-9000 in het vervolgkeuzemenu Type.
- Houd er rekening mee dat de opties "Geluidstoon bij indrukken van toetsen" en "Geluidstoon wanneer scrollvergrendeling is ingeschakeld" ervoor zorgen dat de KP-9000 een pieptoon laat horen bij het indrukken van toetsen en wanneer orders van keukenstations worden gebumpt, als dit is ingeschakeld in de dataset.

- Klik op Opslaan.
- Klik in ControlPoint op het pictogram van de hobbelbalk
- Deze sjabloon moet worden toegewezen aan de controller waarop de KP-9000 is aangesloten:
- Zodra de sjabloon is gemaakt, gaat u terug naar ControlPoint Client, selecteert u het apparaat waarop het toetsenbord wordt aangesloten en klikt u op Apparaat bewerken. Ga op het formulier Apparaat bewerken naar het tabblad Randapparatuur. Selecteer in het vervolgkeuzemenu Bump Bar de sjabloon voor het toetsenblok die u zojuist hebt bewerkt/gemaakt.

- Zodra de sjabloon is gemaakt, gaat u terug naar ControlPoint Client, selecteert u het apparaat waarop het toetsenbord wordt aangesloten en klikt u op Apparaat bewerken. Ga op het formulier Apparaat bewerken naar het tabblad Randapparatuur. Selecteer in het vervolgkeuzemenu Bump Bar de sjabloon voor het toetsenblok die u zojuist hebt bewerkt/gemaakt.
Om de Bump Par-instellingen te openen:
- Selecteer in ControlPoint Client het apparaat van het toetsenblok en klik op Diagnostieken
- Ga naar het tabblad Bump Bar en druk op Program om de instellingen in de klaviersjabloon toe te passen op het toetsenbord zelf.
- Je kunt ook de huidige instellingen en status van de Bump Bar zien in het venster Status ophalen, zoals de levensduur van de batterij en het volume van de pieptoon.


